Wednesday, June 5, 2013

You Can Do It, Put Your Back Into It

We have closed out upper extremity orthotics and moved down the body into making back braces!  The whirlwind of school continues as we fly from one body part to the next; starting with the most simple braces for each part and working our way up in the way of complicated fabrication.  So, our first back brace is the Knight Orthosis.  Unless you are buying a quick velcro strapped, wrap around, off-the-shelf brace, this is the most basic custom one to get.  It involves taking a lot of measurements on your patient and then...metal bending!!!  I really have to set my mind to inventing something that bends the metal for me or some sort of material that can be used in orthotics that is an excellent substitute for metal - I would save many students many hours of frustration if I managed that :)

Alas, we still use metal and this project was no different - nothing like showing up to school to pieces of metal sitting on your workbench, ready to be molded and shaped and contoured to someone's body.

I have to say, I was lucky, I was assigned a very easy patient - she was about the same size as me so I just kept trying the pieces on myself to see how I thought they were fitting.  The big bands that you see in the picture are the ones that go across the mid-back and the lower-back and are quite flexible, so bending them was not a grueling task.  As you can see on my work bench, before we start bending, we draw out a tracing of what we want the metal to be shaped like so as you are bending the metal, you just keep placing it over the tracing to see how close you are and what changes need to be made.  Four pieces of metal seemed totally doable for one day and was not all that painful :)

The most difficult part of making this brace so far was matching the back two bars - the paraspinal bars.  These are the two thin bars that run up your spinal muscles, on either side of your spinal cord.  These bars have to match each other as exactly as possible.  You bend one of the bars to match the tracing you have made on your paper and then you have to bend the second bar to match the first bar!  I have a hard enough time bending one bar to a tracing, but then having to duplicate it just seems crazy!!  My professors have a saying, "sometimes good enough is perfect" and that is what I have to tell myself when trying to bend any two pieces of metal in the exact same shape.

I was able to get all four pieces of metal bent by the end of the day and riveted together to create what is definitely resembling a back brace as this point.  The next step is to create lateral bars to go down the midline of the body (from lowest rib to waist) and then add the padding and the corset straps to secure the brace on the abdomen.  From straight pieces of metal to a solid frame in one day?  I think I can get on board with this back brace thing!


Thursday, May 30, 2013

Tenodesis = Torture

Tenodesis is actually a super fun word to stay.  It makes me feel important, it feels nice coming out of my mouth...but the reality is, my life will be totally okay if I never have to utter the word tenodesis again :)

But this post will be full of all things tenodesis brace related!  Here it is - my completed brace...in all its metal bended and welded and sewn and velcroed glory!!  Its beautiful really.  A work of art.  It does actually look really cool, it looks like something out of a Terminator movie.  And most importantly, it actually works and functions like it is supposed to.  Always lovely to have that feeling of utter pride and ultimate satisfaction when it all comes together like it is supposed to.  These braces are actually pretty interesting, the use of gravity to release the object is fun to work with.  We spent all day grabbing every pen and water bottle we could, really trying these out and getting a grasp (pun intended) on the functionality of the brace.

Don't I make it look fun??  We had to present each of our braces to the class and show that they actually worked, that they were fairly comfortable (as comfortable as you can imagine a metal hand brace might be) and talk about our trials and tribulations we had while fabricating.  We got to work with leather on this project - for the straps - velcro, metal, the blow torch, and barge cement for the foam insert...so lots of different components.  There were many tiny pieces and parts, small and big ones.  Overall, this is by far the most intricate and complex thing we have done this semester and I would be a huge liar if I said I wasn't thrilled to have it over and done and in the books.  It was stressful and time consuming, but as I have said time and time again, it was also a thrilling high at the end to have finished a project and feel really proud of it and see it in action.  The real beauty of making orthoses in school is that we each get to be the patient so I am getting a chance to really experience every device and what it would be like to wear it and use it and live with it.  I think that is going to be something that really benefits me in the future as a practitioner.  I am going to completely and totally understand when my patient comes back to me after a week of wearing this brace and says that he hates it because its bulky and uncomfortable and he is not a fan of wearing a metal thing around his arm.  I am also going to completely and totally force him to sit with me for 25 hours while I make the darn thing so he understands that I had to kill myself making it and therefore, he MUST wear it :)

All in all, the project was a great learning experience and worthwhile...and if I have to make one of these in the future (and by 'have', I mean 'when'), I will be ready!!

This was my partner on the project, Christina...she made the brace I am wearing and I made the one she is wearing.  We both seem to be pretty happy and satisfied customers.


Tuesday, April 30, 2013

Living Without Limitations


A quick and special blog post today about the man who got me into this field.  I would have never known Prosthetics and Orthotics as a potential career path if it were not for Mahesh Mansukhani.  Granted, I am partial to how fantastic he is (and I could write pages about that), but this is about his contribution to the O&P world.  For the last 5 years, Mahesh has been the President of Ossur Americas and has made it his mission to make the business of Orthotics and Prosthetics be a business about the people they are serving.  He has taken a company that needed new ideas and a fresh face and has made it not about just achieving a sales number, but about being on a team and being a part of something bigger.  Mahesh has become passionate about the medical device industry and even more passionate about the people he has met because of the job.  He spends his life on the road, ingrained in every aspect of the business.  The man has been on more business dinners and ride alongs than you can count and easily spends 2/3 of his life sitting on an aisle seat on an airplane.  He can pack a week's worth of suits in a carry-on suitcase, has more hotel points than people who actually live in The Plaza and has to use his cell phone clock to tell him what time zone he is currently in.  He is passionate and committed and it shows in every interaction he has.  He has run Ossur with integrity and heart and he leaves the company in the same manner.  It is my opinion that Ossur will forever be changed by the impact that Mahesh has made on the company and I know that Mahesh has forever been changed by getting to know this industry.  He has started a Well-Being Initiative, spearheading a cause to provide amputees with access and ability to focus on their mental health.  He has attended the fundraisers and events and dinners, but the most important thing he has done is to create an environment that focuses on the patients, the people, and the product .  I know the end of his time at Ossur is bittersweet for Mahesh; 5 years of blood, sweat and tears - heart and soul.  This experience was more than just a job, it was a lifestyle.  As the tides are changing and the next chapter begins, I am just so proud of him and I know that he will continue to support the industry and stay involved and I know that he will be greatly missed.  Looking forward to starting a great new adventure with him :)

Tuesday, March 12, 2013

It's All in the Wrist

I really have to start taking better "before" pictures so you can really appreciate how much work went into what you are currently looking at in this stage of making this orthosis.  This next project is a wrist driven orthosis - a ratchet design that is never used anymore, but operates by using wrist extension (bending your wrist back) to cause the first two fingers and thumb to make a pinching motion.  When the wrist is relaxed from extension into flexion, the fingers open and the pinching grasp releases.  This is great for someone who still has the extensor muscles present in their forearm, but cannot fully use their fingers.  It allows them to pick up objects, grasp things, and even write.

We were given a bag full of pieces of straight metal and a lot of rivets and screws and expected to create this device.  So, what you are looking at in the above picture is about 10 hours of metal bending work at its finest :)  The two big metal pieces were both straight and had to be bent and fit to my patient.  They had to be cut and trimmed down and smoothed - it was a very long process...made even longer by having to share the machines with 16 other people.

After getting these two pieces bent correctly and attached to each other, I then had to create the finger pieces for the brace.  Originally, looking at the finger pieces, this did not seem like it was going to be a huge obstacle.  Wrong!!  The first part of the finger pieces is bending three tiny metal strips to circle around the top half of the fingers.  I thought bending metal around a forearm was super tough.  Bending metal around the width of two fingers is brutal!  It is a very tedious task to try and make these tiny, tight bends.  The finger piece of the wrist driven orthosis has to be just right in order to keep the device on and functioning and comfortable.

This is what the finger piece looks like when it is all said and done.  Tiny bent metal and a tiny bent rod holding it all together.  This piece was made for my partner so it does not fit exactly right on me, but it shows what I spent 4 hours creating.  The metal bending was the tricky part, but then we got to solder the metal to hold it all together and that was very exciting!  And very scary!  I have become accustomed to using blow torches at school, but not in this way!  We typically just use them to get some plastic warm and mold it a little bit, not to melt silver and drip it onto metal in order to fuse it together.  This was my first time soldering and although I got the hang of it rather quickly, it was quite intense and (on par with all the new things I am learning at school) somewhat stressful.

But let's be honest, I look pretty cool wielding a torch and obviously it brings a smile to my face.  Fine, I will give soldering another chance!  Melting things is typically frowned upon so it was fun to be told that this was part of the process.


I was able to get the finger piece completed and walk away from the wrist driven device for the day.  Staring at pieces of bendable metal for 9 hours in one day really just makes you want to throw it out the window.  I cannot believe this project still has two more days of fabrication before it will be done!!  No wonder they do not make these in practice anymore, it is not practical to have to spend 25 hours working on one orthotic device.  That, and it looks like it came out of the stone ages!!  No one wants to wear a purely metal contraption on their arm...well, maybe not no one, but I know for me it does not work with my gold jewelry :)

Sunday, March 10, 2013

A Quick Fix

Okay, I have a confession to make - the hours of the Orthotics program at school are much less than they were in Prosthetics...logically, you would think that this means I would have much more time to blog - except I seem to just get wrapped up in doing more of nothing when I have nothing to do.  So, I am obviously behind and we have moved on past the upper limb orthotics, but I am going to continue to update in the order of our projects thus far in the semester.

Last post was working on my specific diagnosis of making a brace for a classmate who had "severed his tendon of the flexor digitorum superficialis."  I got pretty far in making the brace the first day so all I had to do was smooth up the trimlines and attach the straps.  I am happy (and very proud) to report that I sewed my straps with very little stress.  They do not look perfect, but they are much improved!!  The projects we are doing right now are basically for knowledge of how to do something, not necessarily to create a perfect final project.  We are riveting a lot of things on just for quickness of completion - not the way it would be done in practice.


After sewing the straps and riveting them on the brace, the project was complete!  I fit it on my patient and it kept his hand and wrist in a neutral position, doing its job in keeping the tendon from being able to move, therefore giving it time to heal.


Not much to look at, but it was a pretty simple diagnosis and that makes for a pretty simple and straightforward brace.  We had a couple of hours to finish up our projects in the morning and then went straight into critique in the afternoon.  My critique went well and I was happy and relieved to know that I had created an appropriate brace for the diagnosis I was given.  I love the "real life" aspect of being given a diagnosis and no solution and no direction for a brace and being able to use what I have learned and research in order to create what I think is the right thing.  It is a great learning experience and makes school feel so much more applicable.

Here I am modeling the brace that was made for me by a classmate.  The diagnosis going with my brace was ulnar nerve palsy - meaning the nerve that runs down the side where the pinky finger is affected in some way.  This causes the hand to form a "claw" and affects your ability to perform small hand motor function movements.  The brace that my partner made for me kept the hand in the claw position in order to accommodate for the ulnar nerve being affected and potentially painful, but left the thumb and ring finger and pinky finger free in order to allow some movement and some function of the hand.

We have one more upper extremity project and apparently it is the worst one ever!  We are going to be making a wrist driven device - it is a big metal contraption that apparently is never used anymore in practice.  My professor who is in his 60s said that during his 30 year career he only made one.  We were told we will be making them as sort of a 'rite of passage' into the world of orthotics.  I, personally, would not be offended to not make that journey, but it looks like my grade depends on it.  Next up, more metal bending and and ancient wrist hand orthoses :)

Friday, February 15, 2013

Moving on From Metal

We finally got a small reprieve from all of the metal bending and were able to design plastic wrist hand orthoses today.  Creating a plastic molded device means first creating the mold...I think it is easy to see where this is going...back to the world of plaster molds!!  Casting a patient and then using the cast to create the mold that then becomes the form to vacuum plastic around for the device.

To the left, you can see the bits and pieces that make up my cast of the forearm, fingers, and thumb.  In orthotics, because it is focusing on correcting limbs rather than supplementing for not having a limb, we mainly use each other as patients.  For this assignment, we were each given a classmate partner and a random diagnosis to create a custom WHO around.  I loved that everyone had a different pathology to work from because it meant there were 17 different projects in the class and it gave everyone a chance to research their own diagnosis and have to use what we are learning to decide what type of orthotic device would be necessary for that diagnosis.

My patient sits caddy-corner to me in the workroom and the diagnosis I was given was a "tendon laceration of the flexor digitorum superficialis."  Yes, it sounds fancy and too many words for what the simple, watered-down version actually is...a suicide attempt by slitting the wrist.  How pleasant, right??

So, after researching, I learned that the brace needed for a cut tendon is one that keeps the tendon immobile and gives it time to rest in order to heal.  The flexor digitorum superficialis goes down from the wrist into the fingers and is what would help you wave "bye-bye" if you were a toddler.  It curls the fingers down.  In order to keep this tendon from moving, my job was to make an orthotic brace that held the forearm and the fingers in one position - one where they could not be flexed or extended.  The nice part about creating orthotics is that the casting and modifying goes much quicker than it does in prosthetics.  Because I was creating a brace that was only going to go on the wrist and palmar side of hand and it was a device that was just going to fit on the patient's current forearm/hand, all I had to do in modification was smooth up my cast to get it ready for the plastic.  I was also able to cut my thumb portion off because the thumb is not moved by the tendon that was injured in my diagnosis and therefore does not have to be included in the brace.  My patient is not able to move a single one of his fingers, but he can let his thumb go wild!

Vacuum forming plastic is exactly the same as it was in prosthetics - simply drape the melted plastic sheet over the mold and turn on the vacuum switch to get it to mold to the cast.  It also still makes me equally panicky as it did in prosthetics.  I am getting better at handling the flimsy burning hot, drooping plastic square from the oven, but I still get anxious about the timing of it all and getting it right on the first try.  Luckily, I got this one right on and had the flexibility of knowing I was cutting off the entire back portion of this brace so putting a seam in it or a wrinkle in the back was not going to ruin the project.  Phew :)

And this is what my WHO looked like by the end of the day.  Like I said, it goes much faster in orthotics so I was able to get from the casting point to this point in one day - completely unheard of when I was working on a leg in prosthetics!!  This device is not made for me (as you can tell it is much too big in the picture), but this way you can get an idea as to where I am going with the project.  It keeps the patients fingers in a relaxed position and the forearm supported.  It provides total contact on the affected side and also can easily be removed for hygienic purposes.  Up next is to smooth out the plastic around all of the edges, fit it on my patient and make sure the trim lines are in the right place and then to sew and attach the velcro straps.  As you can tell by my filthy and cluttered workbench, this was a good stopping point for the day - it was a long time in the lab and I need the rest to gear up for attempting to make nice with the sewing machine for my straps.  A completed plastic WHO and a critique to immediately follow are up next on the agenda.  Stay tuned...


Wednesday, February 6, 2013

WHOs and HOs

Orthotics has officially begun!!  My career in custom bracing has started out with bending metal and making a HO.  You read correctly...we actually made a device called a HO.  It stands for hand orthosis, but everyone seems to prefer the shortened version.  It makes for amusing lectures with immature responses from the class.

It looks like nothing, right?  Such a small device that took more sweat than seems necessary.  It is rather ugly, I recognize this - in fact, I was happy to throw it away after I was done.  This was a first day of school learning experience.  The only impressive part about this HO is that I really made the entire thing myself - bent the metal, sewed the straps, glued in the foam interface, and riveted the pieces all together.  Bending metal = no fun.  To get a straight piece of metal to wrap completely around someone's hand is time consuming and much harder than it looks.  I think the idea is to be able to make one of these in about half an hour, but this was a two afternoon project in the world of first timers.  The only reason a person would really need this device would be if they needed to hold their thumb is this position.  Most hand orthoses come with a wrist portion attached - this would be the major reason to put a crazy metal contraption onto someone's hand.  Which, of course, in a lovely segue - leads me to our second project of orthotic school...the WHO!!

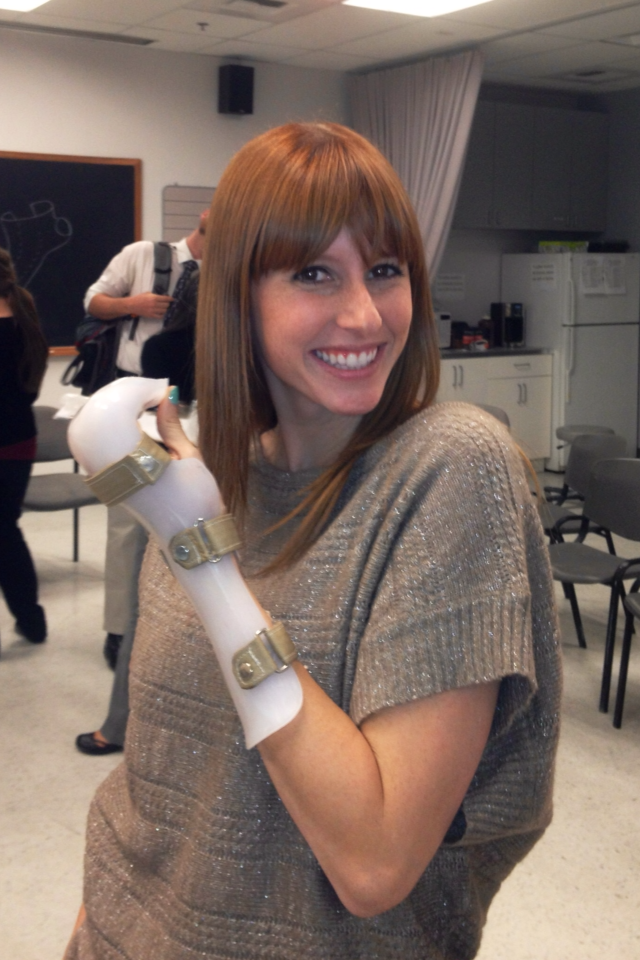
Hopefully your deductive reasoning skills have kicked in and you have figured out that a WHO is a wrist hand orthosis.  This is me modeling the one that my partner made for me.  We actually used our previously made HOs and then just added the forearm and wrist components to make this lovely brace.  I think having a great manicure and the party nail really jazzes up the hunk of metal attached to my hand.  Thankfully, off the shelf bracing has come a long way and this is the old school way to make a wrist and hand brace - I cannot imagine that many people would be thrilled about having to wear this in their every day life.  Also, I might add that it is slightly dangerous - I would forget which hand I had it on and go up to brush my hair out of my eyes and a piece of hard metal would poke me in the face.  This was, per typical school protocol, just another learning experience.  We are trying to get practice bending metal and sewing straps.  Bending metal is still something I could take or leave, but I am happy to report that I am no longer scared of the pedal on the sewing machine.  We have found a nice rhythm and seemed to get along this week.  My velcro straps were top notch :)

I am also happy to say that the orthotics portion of school is going swimmingly.  The pace seems much slower than that of prosthetics, but it is hard to say if it is actually slower or if I am just adapting to a learning environment that moves so quickly.  We seems to have more time to fabricate our devices...again, not sure if this is actually meaning more hours to accomplish something or that having completed the prosthetics program, I am actually fabricating things more quickly.  The most interesting part of orthotics and bracing to me is that you have to really learn all of the pathologies that come along with the need for orthotic intervention in order to really make a great device.  We have pathology lectures multiple times a week and I have really been enjoying learning the ins and outs of what a stroke can do to cause a person to need an orthosis; what happens when a person suffers from a traumatic brain injury and what type of interventions can be used in their recovery.

I think that prosthetics has my heart, but I am really going to continue giving orthotics a chance.  It does not have the same pizazz as making someone a leg and watching them walk for the first time, but to put it in perspective makes me realize that making a back brace for someone who has been suffering greatly from back pain and helping to relieve that is still a chance to help improve someone's quality of life...and that makes me smile.


Sunday, February 3, 2013

I Graduated!!


It is done!!  Well, part one is done.  Graduation came and went - it was exciting and uneventful at the same time.  Graduating and knowing you are going right back into school makes it hard to feel as though graduation is the end to something.  I think when I graduate in May from the Orthotics program it will feel much more real, much more final...and rather than being an ending to all of my education, it will be a beginning to the start of a fantastic career in prosthetics and orthotics.  Orthotics blogs coming up...get ready to be enthralled in the world of custom bracing!!

Sunday, December 30, 2012

Oh, My(o)!!


Typical of life in the world of prosthetics...just when I think that upper extremity is not my cup of tea and does not have quite the "wow factor" that making legs does...I get to put on my myoelectric arm!!  This is like creating a robot (and I tried that when I was in 3rd grade and it was completely unsuccessful).  My myo arm, on the other hand, worked beautifully.  It was like watching living art.  Okay, I know I am being a little dramatic here, but it was really amazing - and gave me the same rush as seeing someone walk in a leg that I have made.

I had a model patient (not to be confused with a patient model - which he was also).  He has used myoelectric arms in the past (this obviously helped because he was well schooled in isolating his muscle groups and using the right ones to open and close the hand), but he does not wear one now - he prefers his hook.  I have to brag on myself for a moment because he did say that this was the best total fitting, total contact socket he had ever had.  Hooray, self-congratulatory pats on the back...all of that :)  I am allowed to brag about the best fitting comment because after wearing the arm for about half an hour and moving around, it began to fit a little too well.  Meaning, we could not get the thing off.  This is not a joke.  We were pouring powder down into the socket, using lotion - it would not come off.  I began sweating (bad day to wear a cashmere sweater) and was completely panicked that this poor man was going to have to have my socket cut off his arm.  I was worried that it was hurting him and I have to be honest, the student in me was a little worried about the future of my grade if we did not solve this problem.  My professor eventually spotted my panicked stricken face and saw three of us tugging on the arm and came up with a magic solution.  Air!!  Myoelectric sockets have holes drilled into the bottom in order to pull the patient into them (because they are supposed to fit so snugly), so he placed a tube into the hole and blew air in it so it popped off.  Phew.  I was so relieved.  So, the obvious good new is that the socket did come off my patient, the bad news is that when it got stuck it was just in the time period in which we were fitting the sockets - I still had to present my arm to the class for critique!  I was not really ecstatic about the idea of putting the arm back on my patient, but he was a good sport and figured if we had to resort to the air to get it off again, it was not the end of the world.  The school must pay these patient models a decent amount of money ;)

This is me shaking my patient's hand...my face does not look quite so polite because this was before we had given him a lot of practice and this was more of a hand crushing than a hand shaking.  After wearing the arm for 10 minutes, he was picking up his coffee in a plastic cup and easily drinking it and putting it back down.  He was able to control the speed at which he opened and closed the hand and the amount of force he used when grasping an object.  Like I said, pretty amazing.  It was just a really exciting day - moreso than I had imagined.  I could not believe that by making this socket and implanting two little sensors and screwing on a hand - fairly simple tasks - the end result would be so awe inspiring.  Granted, I did not create the actual hand and the fancy technology to go with it, I just helped implement it, but that was enough to end my semester on a really high note.

Yes, you read correctly...I said end the semester.  This was officially the last project of the semester and it was actually my highest scoring project yet!  I guess that is the whole goal, right?  Continue to improve - makes sense that I should be getting the best grades when I have the most "experience."  

So, we rushed through upper extremity...got a crash course and now we will be rigorously tested to see what knowledge we have retained.  Next on the agenda is two full days of finals - I believe 8 tests in all.  We will be tested on everything from the entire course - all the way back to transtibial (which is a little scary because I am not sure I remember a thing)!  After the two days of testing...provided they go well...I graduate.  Then they send me out into the real world.  Okay, thankfully for me, I am coming back to do the orthotics program in the Spring so I get to avoid the real world for at least another few months :)  Next time I post, it should be about graduation - so if I do not resurface, it is because the finals were too overwhelming and I decided to move to the Caribbean and be a bar tender.  Maybe if I get tired of studying I will watch Tom Cruise in Cocktail and work on my bottle spinning moves...


Sunday, December 16, 2012

Getting Hooked on Upper Extremity

Well, when we started working on arms, all I could think was - I am running a "leg only" clinic!!  I just keep getting comfortable with one part of the body and having the tables turned on me and the feeling of helplessness makes me want to run back to what I know...which is a whole 13 weeks of lower extremities :)

Onto the important stuff - the fitting of my arm prosthesis.  My biggest fear in these fittings became my biggest reality...my socket would not go on my patient's arm.  Not even with lotion and coaxing.  I thought I was going to have to bag this project and chalk it up to a rookie mistake and hope for a better result next time.  Oh, no no no, not in prosthetic school...we are "failing forward" and there is no chalking anything up and turning the page.  There is only figuring it out in the following four hours!!  

So, that is what I did.  I heated up my socket, I flared it out, I trimmed it down and I magically got it on my patient.  Phew, one thing down.  It was not easy and not quick, but it had to happen in order to keep moving forward with my fitting.  I was so relieved when my patient was able to get this arm on that I was not too worried about operating the hook and working out the harness fit.  

The harness is easily adjustable so that was no big deal, the hook and cable and all of that was another source of drama and stress for the day.  I was cutting my cable over and over to get it the right length...repositioning my hook and adding rubber bands.  Long story short - it took a LOT of work, but at the end of the four hour fitting, my patient was able to wear the prosthesis and fully operate the hook to complete all the tasks required by my professor's check-out standards.  I was then able to chalk this one up to a successful project...and that made me very happy and very relieved.  Maybe upper extremity isn't so awful :)


As always, the day is never short and our reward for completing a project is the introduction to our next project.  In upper extremity, our next project is to create a myoelectric arm.  This was the second cast and mold that I worked on the day after finishing my arm with the hook.  The myoelectric arm is the one that is controlled by sensors on the muscles of forearm of the patient - these sensors are used to open or close or rotate a hand/hook.  

So, our afternoon was spent learning the ins and outs of myoelectrics that we will be fitting our patients with in the morning.  We learned the computer programs that go with the sensors and how to use the sensors and find the exact right muscle spots to get the most out of the sensors.  We actually got to put them on our own arms and hold the myoelectric hands in our hands and operate them - opening and closing - to see what our patients would be experiencing.  Per usual, I love the real life application that we were given in getting to use the sensors.  It is much harder than you think to control only one muscle group at a time.  In order for the sensors to work best, you have to flex with one group to close the hand and extend an other muscle group to open the hand - working on this control and fine tuning it to open slowly or close halfway is really difficult.  Most of the time, patients are sent home with sensors and computer programs that include games in order to get their muscles used to functioning the right way so the will be able to get the most out of their future myoelectric device.  

I was staring at this suitcase full of hands all during the lecture...it was a little creepy so I thought I would share :)

Tomorrow we fit our myoelectric sockets and then hopefully get our patients working on the sensors and able to make these arms fully functional!!

Monday, December 10, 2012

Fun with Foam!

One day...two arms.  Probably the toughest task given to us the whole semester.  Starting a new body part is tough because I am always clueless when it comes to modifying - as I should be, this is school.  We typically get a day or two to get the modifications done before moving on to completing whatever limb we are making.  This is not the case when there are only 2 weeks left until graduation!!  We casted in the morning, modified in the afternoon and completed the entire arm by the end of the day.  It was insane.  And awful :)

I forgot to take a picture of just the plaster mold, but let's be honest...we have seen about a hundred of those over the last few months.  We were told the modifications for this arm should only take about half an hour - again, let's be honest...it took me a solid two hours.  That is okay, all in the name of learning!!  After modifying the mold, it was time to do the vacuum plastic - this time we used a more flexible plastic in order to make it easier for our patients to get their arms into the socket.  This made for a quick and easy melting and vacuum forming process.  Thank goodness for something that was quick and easy at this point in the day!

After getting the plastic socket made came the craziest thing I think we have done yet - and that is saying a lot considering all the things we have made this semester.  I need to make the crazy scale relative - it was not the craziest thing as far as most intense or greatest impact or any of that...it was the craziest thing as far as in the world of science and materials.  Because these residual limbs are so short and they need to made into a full length arm to match the sound side limb, we have to foam material over the socket to add the length of the prosthesis.  So, I took plastic, made a funnel cover and then mixed two liquids together in a cup and poured it into the funnel and it literally became foam.  It was amazing.  When I poured it in it only came up about one third of the way of the funnel and then with the power and magic of modern science, it started to become foam and slowly rose out and over the top of the plastic funnel.  I felt like I was in the 6th grade making an erupting volcano for the science fair...I was like, when do we get to do this part again!? After about 15 minutes, the foam is set and ready to go. Then it was just about sanding it and trimming it down to make it into the shape of an arm...or somewhat into the shape of an arm.  Regardless, I do not feel like I am doing the foam part justice, but trust me, it was the highlight of the day.

After getting the foam right, I fiberglassed over the whole thing (to provide some rigidity and strength since we are not laminating these) and then began to attach all of the components.  When I said I was making this from scratch, I was not kidding.  I put on the wrist unit, I was attaching straps with rivets (okay, confession, I could have sewed the straps, but I found ones that were already done in the bin at school), I screwed the hook in and I even made the whole cable by myself.  Stringing wire through the housing, melting Teflon, using wire cutters - pretty tough stuff :)  After getting everything hooked to the arm, I attached the triceps cuff and the shoulder harness and the arm was done and ready to go.  And so was I!!  This was so much to get done in one day that I really never thought it could happen.  It is crazy to look at the first picture right after doing the vacuumed plastic and then to think a few hours (an eternity) later, it is a prosthetic arm all ready to go...with a working hook and everything!  What a day!!  And just when I thought it was over and I could go home and get the plaster and fiberglass out of my hair and off my shoes...we were told we had to pull our second arm socket.  That is right - I forgot to mention that when we casted our patients in the morning, we actually casted two patients each!!  They are really cramming this upper extremity stuff in at the last minute!  So, because we took two casts on two different patients...we then have to make two different sockets.  The point of this is that one socket is going to be the hook socket and for the other socket, we are going to make a myoelectric arm (one that is operated by sensors attached to the muscles in the arm).

Alas, just when I was patting myself on the back (with my freshly created arm), I had to smooth up my second arm and get it pulled and ready by the end of the day.  Luckily, a longer trans-radial amputation is much easier to modify so this one did only actually take about half an hour.  I was able to smooth it out and get the socket pulled before they turned the lights out on us for the day.  We have a couple of more days to get the second socket cut out and smoothed before the myoelectric fittings...phew.

As always, my biggest concern for the prosthetic fitting (for my first arm - with the hook) is that it will not even go onto the limb.  As I mentioned in the last blog, upper extremity is all about exact fit so without that, I might be in trouble.  I know I can get the hook working and the harnessing attached correctly and comfortably so I am focusing on getting my patient into the socket and then going from there.  Here is to another successful fitting, happy patient and high marks in critique!

Sunday, December 9, 2012

Movin' on Up

We have closed the chapter on legs and have moved above the waist to upper extremities...aka, arms!  Upper extremity prosthetics is a whole different ballgame - when making legs, it is all about function (comfort plays a big role, of course, but you want to get the person up and walking).  In upper extremity prosthetics, it is more of form over function.  The majority of people with upper limb deficiencies have already adapted their lives to accommodate for whatever their limb difference might be, and most choose not to even wear a prosthesis.  Upper extremity has not come as far as lower extremity, so with hooks being one of the best options, many users choose to wear nothing instead.  If someone chooses to wear an arm prosthesis, a lot of times, it is for cosmetic reasons - this is where you have to get the form of the prosthetic device just right.

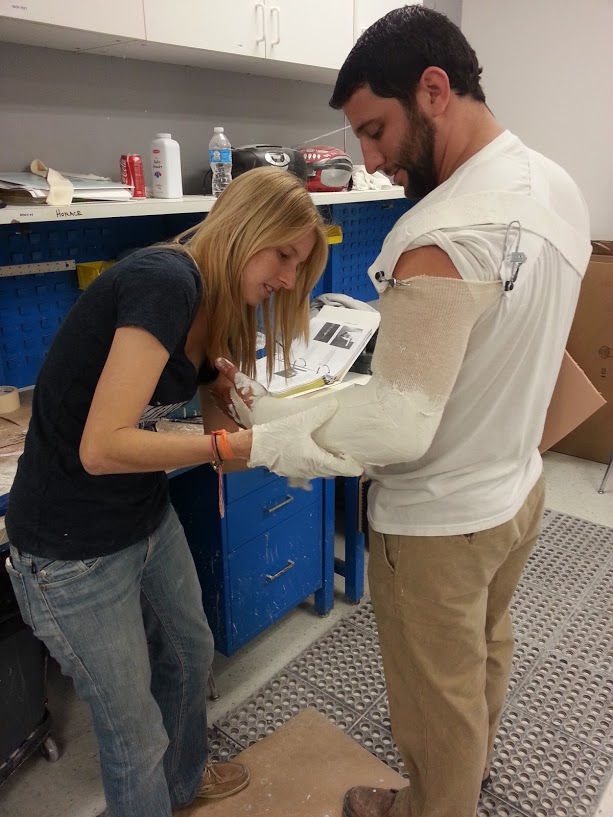
So, like the beginning of every other new topic, we used ourselves and each other as patients.  We casted as though we were casting someone with a wrist disarticulation - essentially, someone who has just lost only their hand.  It is strange, but this casting was a little trickier to get just right...moreso than the legs were the first time.  We also had to use splinting methods, as opposed to wrapping, and that made it hard to capture the volume and all of the anatomical landmarks.  A lot of prosthetic arms are self-suspending so it is really important to get the fit just perfect.  A lot of them also involve wearing a harness (as you see in the pictures) and that is a second form of suspension if it does not suspend on its own via the skin or a liner.  Horace made a lovely cast of my arm and created a comfortable socket for me to wear around school.  It probably helped that I was a model patient :)


It is always interesting to be put in the patient's shoes - such a different perspective in the casting.  As a practitioner, I am constantly feeling rushed and like the plaster is setting off and getting hard too quickly.  I am hurrying to get it all done before it is too late, but as a patient, it seems as though you have to hold this position forever before the plaster turns into the hard cast.  Trying not to move to help out your practitioner is a little stressful...something important for me to remember in the future!


Horace was an equally great patient - if only his arms were not so darn big :)  I made it easy on him, he only had to make the tiniest little cast ever.  I was struggling to get my hands around both of the splits and hold the whole thing in place on his arm.  There are all of the rules about getting the elbow in and making sure it can bend and going over epicondyles...I felt as though I did a pretty decent job for my first ever arm casting, but like I said, it was surprisingly more difficult than I had imagined.


The last half of the day, we were fitting each other for modified arm prostheses.  I mentioned that a lot of them involve wearing a harness and this hook is the very reason why.  It is attached to a cable system that is activated to open and close by elevating or rotating your shoulders.  The harness system allows for pulling to occur and the cable to pull back on the hook and open or close it.  Getting to wear this was like when we put on the walking boot and got to experience what walking on a prosthetic foot feels like.  I love when the school is able to make this really applicable and give me a chance to feel first hand (in a small way), what it is like to have a limb difference.  I know that when you live with this harness and hook system it becomes second nature and patients do not have to even think about operating them, but we were attempting to do normal things (unbutton your jeans, pick up a water bottle, get keys out of a purse) and it was tough!!  We also had to be able to get ourselves in and out of the harness with one arm on our own...this involves some contouring and acrobatics for sure!!

All in all, our first day in upper extremity went really well - I learned a lot and it was super jam packed, but this is something I really know very little about (and have seen very little in the field) so I am glad to be learning it and glad to be getting some hands on experience.  We will cast our patients and make them the same type of hook and harness device - from scratch - and hopefully all of the pieces and parts come together to make a working arm!

Thursday, December 6, 2012

There's No Time...There's Never Any Time!!

School is winding down and it is insane!!  This has been one of, if not, the longest weeks of the semester...we have done upper extremity all week and it has been an exhausting whirlwind!!  I have to give a research presentation tomorrow and am in the middle of creating my PowerPoint for it, but I thought I would post a few fun pictures from the last few weeks...just so you do not think I have quit school and taken up a career elsewhere :)

Representing for the Symbionic leg on a patient visit day - we actually did not even plan this, but I thought it looked adorable!

No forewarning class picture at the end of a super long day of patient visits and critiques...I wish I would have known, I would have put on mascara or something :)

Me, Horace and Erin during a photo shoot for Cal State's website about the O&P program...natural models.

Friday, November 30, 2012

Take Initiative...

This is a quick fundraising and awareness raising plug.  I could give you all of the facts about people with limb loss and their emotional well-being and mental health, but I highly recommend that you watch this presentation and learn these statistics for yourself.

Tonight I am attending a fundraiser specifically aimed at trying to not just raise money, but to raise awareness and aid for the mental health and care of people living with limb loss.  It is a truly great cause and one that hopefully begins to gain more momentum as more people become aware of how this really impacts this community.


If you are inspired and feel led to donate - we are trying to reach a goal of $200k and have currently raised $170k thus far - any amount will be used and appreciated.  Here is the link for the donation page...

Sunday, November 25, 2012

A Farewell to Legs

The end is near!  I mean, like it is done - my school career in leg making has come to a close.  Insane.  I am not sure how it went by so quickly...I blinked and went from my first cast to laminating this last leg. After getting the lamination done, I trimmed my socket out and I was so excited about the way it looked!  The inner liner came out just as it was supposed to and having a pattern on the socket really makes it much cooler in my opinion.  When you are spending hours with this leg, getting to put a little bit of creativity and fun into it puts a smile on your face.  Everything about making a leg is about following a pattern, following a specific body or bone or alignment - getting to jazz it up and make it fun is more about you as a practitioner, and typically, most specifically about your patient.  As I mentioned earlier, these legs were about us because we were the ones taking them home, but hopefully in the future, my patients and I see eye to eye on all of the fun stuff we can do with their sockets :)

I put a different pattern on the inside of the leg and was actually pleasantly surprised by how cool it came out as far as looks goes, but I did manage to miss a few spots with the resin and therefore it was just some patches of soft fabric on the inside as opposed to all hard and glossy and smooth like it was supposed to be.  Oops.  Time for prosthetic problem solving - a little adjustment to the trimlines and a little extra fiberglass and resin and I was good to go.  Rookie mistake - I can guarantee you I will not "under-resin" ever again!!  What would school be if not for making mistakes and learning from them?  

After I got the socket smoothed and sanded down and dropped the outer hard layer down so the inner flexible liner would have room to actually be flexible, I was able to gunk on the components.  This part is always a little stressful to me because it has to be in the right angle and flexed and all of that, it just seems so final.  The flip side of that being that it IS final...and that means you are at the end of the leg making stage - attaching the components is just tightening a few screws!  (My professors would kill me for saying that, clearly there is much more that goes into it.)


Now it becomes one of those cooking shows where they magically have everything already prepared before starting and they just keep throwing ingredients in and pulling out beautifully cooked dishes.  I did a little gunking and fiberglassing and voila - here is my completed leg!  Everything attached and everything working and now I just need a patient to make it walk back and forth.  I always feel like a leg that stands up on its own is a good sign - at least I know it is all level to begin with.  So, this is all ready and good to go for Paul's arrival - I just need him to bring his shoes and a good attitude and hopefully some extra energy to do some walking.  Critiques for these last projects are supposed to be much shorter and much easier than the previous ones because with transfemoral sockets, it is mainly the socket fit that causes the problems, not as much the alignment.  And, according to our professors, will all of our alignment practice this semester (all 12 weeks thus far), we were not going to focus too much on that during critique.  And since we had all been able to make at least two sockets for these current patients, in an ideal world, our sockets should have been fitting pretty nicely.

The key phrase in that last statement being "ideal world."  Despite my addiction of the silicone pad and taking off a lot of plaster before creating this second socket, my socket was still a little too big on Paul.  It was not crazy, a simple pad made it much better, but I was surprised it was still big with the amount of material that I had added and taken off after the test socket.  Paul is also a little on the fleshy side and tends to go nuts with his diet (McDonalds for breakfast before the last fitting, chocolate cake for midnight snack this time around) and so it is hard to predict what his body is going to do in response to his diet.  Too much salt and he is swollen, one skipped meal and he is dropping down in size.  This is a common issue with a lot of patients so definitely something I will see again...good thing I love a challenge :)  So, here I am on critique day, proudly displaying my finished leg and dressed to impress.  My critique went well, Paul walked around and overall, the fit, like I said, was not horrible.  It is so crazy that this was my last big project of school and that I am going to be graduating in four weeks!!  We do a couple of upper extremity things in the next couple of weeks, but nothing really major like these legs we have been making.  It is all coming to an end quickly.  

Because of the finality of the project, it was a big picture day at school - they even had professional photographers in capturing it all.  Everyone was feeling very accomplished and very pleased with themselves and it was fun to have everyone feeling relaxed and proud and taking a moment to celebrate our accomplishments so far.


Sunday, November 18, 2012

The End is Near


Well, after the initial fitting and adding the silicone padding and tweaking my check socket a little bit, I filled it with plaster and set about creating a new mold to base my final socket on.  After getting the new mold as smooth as possible, I pulled a really flexible material over it to create an inner liner for the final socket.  It is thin and easy to manipulate and goes inside the final socket.  This provides more freedom and definitely more comfort, mainly at the top of the socket where it meets the skin.  It enables me to lower the trim lines of the hard outer socket and provides the patient with the same amount of support, but with more flexibility.  We treated this inner liner the same as any other socket made out of plastic and had to cut it off the mold once it cooled.  I left the flexible inner liner on the socket because the next step was to laminate the socket to create a hard and durable outer socket.  We have only done this one other time this semester and I feel like that was ages ago so it seemed a little bit intimidating!!  We were also encouraged to use fun fabrics in our laminations this time because it is our final big project and the one that most people take home with them as a little souvenir.  

You will be shocked to find out that I chose to use an Indian themed fabric print for my socket :)  It was total coincidence that this was one of the fabrics that happened to be at school and I actually really thought it was cool looking and different.  Laminating is always a crazy time, you only have a certain number of minutes before the resin you pour into the bag over the socket gets hard and there is a lot to remember.  I took the original mold with the flexible inner liner over it and then there was a long set-up process involved to get it to the point of lamination.  I used a different fabric print on my first layer, so when you look down into the socket, it is also patterned.  Then we alternated between nylon and fiberglass (for strength and support) until we had 6 layers of nylon and 3 layers of fiberglass before adding the final outer layer of pattern.  Once it is set up and ready to go, mix the resin and then pull a bag down over the socket.  You pour the resin into the bag using a funnel and draw it down into the bag with a string or your hands...once it covers the entire socket, you just have to sit back and wait and let it get hot and then set off and get hard.  Seems fairly straight forward, right??


The room is always a little nuts and a lot crowded when everyone is trying to get their socket laminated at the same time before the end of the day deadline...this always makes things a little more stressful for me, but I have to remember that in real life, I will not be competing for space with 17 other students!  Almost everyone managed to get their sockets laminated and done by the end of the day - always a huge relief for me when I make the deadline...makes going into the next day so much easier and less stressful.  

Respirators are a must when you are laminating - fumes and whatnot...I think it certainly does not hurt to protect all of my insides!  And like I have mentioned before, they just look so dang good on me :)  Now that the lamination is done and complete, I just had to wait for it to set off and then the next step in the process is to trim out the socket and smooth it down and get my flexible inner liner out and smoothed as well.  Once those two things are done, it is time to gunk and attach my knee and feet and hope my patient can walk in this leg!!  If he cannot...at least it looks really cool and gives off an air of peacefulness and harmony.  I figured a few meditating gods on the socket could only help me in having a good patient visit on the next day!  

Wednesday, November 14, 2012

Playing Catch Up

I know, I know, I am very behind on posting.  I am sure a lot of people could not even sleep this past weekend because they had no idea how my leg fitting with Paul went last week.  Never fear, I am here to start catching you up!

This is what the training room looks like on the morning of a patient appointment.  My station was all set up with my finished leg waiting and ready to go!  Paul came in and he did not seem like he was much in the mood for being there, but he was a good sport and let me and my partner try our legs on him multiple times in the four hour allotted time.  The first fitting is just putting the leg on, seeing what needs to be changed, taking the leg off, changing what you can, and putting it back on again to see if it is fitting any better.  At first it seemed as if my leg was not going to even fit on Paul - he was having a hard time getting down into it, but after a little tweaking and some lubricant, he was able to get all the way into the socket comfortably.  Phew.  I was able to get good suction (meaning the leg was not going to fall off of him when he started walking) and he said that the socket felt really good. The only major issue I had was that there was a big gap one the side and back on the socket.  It is just where a lot of fleshy tissue can go so it may have had tissue in it when I casted him and depending on the way he was standing during the fitting, it might have moved around...regardless, it was too big in that area and needed to be fixed.  The quick fix is to put silicone in the socket to see how much filler you need and to let it mold to the patient's body in order to be able to create a better fitting socket later.

This is what my giant clump of silicone looked like in my check socket.  This seemed to do the trick and I was able to get Paul walking back and forth (bending the knee and everything) for the last part of the appointment.  We are actually going to create a second socket for these patients - we have just been making test sockets and throwing them away after one time, but because this is our last big project, we are going to really make the whole leg and try and make it look somewhat professional.  The way to go about making the second socket is to fill this plastic check socket with plaster and create a whole new mold.  The beauty of making all of your modifications and putting the silicone in this socket is that when you pour plastic and pull out a new mold, ideally, it should be exactly the mold you are trying to achieve and not need any more modifications.  We will take the second mold and use that to create a flexible inner liner (for comfort) and then a more stable and finished socket.  This is the part where we get to be creative and use fun fabrics and make cool legs.  I cannot wait!!

I will post another update tomorrow and by the weekend, I should be caught up.  In real life (not in this catch up world on the blog), we are fitting our patients tomorrow with our finished legs and will have a critique on Monday.  By Monday, I will be up to speed on here so we can all experience the critique in real time together :)

Monday, November 12, 2012

The Best Vet

In honor of Veteran's Day (no school today) - I wanted to share a video about the only veteran I have really gotten to know on a personal level.  I met Dan at the camp I volunteered for this summer.  It is easy to become a person who feels little or no effects of the war when you do not really know anyone who is fighting in it.  That was me.  I had no friends or siblings or anyone really close to me who was fighting in this war...I only knew what I saw on TV or read in the papers.  Until I got to camp...and I met Dan.  I am including a video that tells Dan's whole story so I will not go into the details myself...but Dan is amazing.  His attitude towards life, his willingness to push himself and never give up - he is the kind of person who would inspire anyone.  He fought for his country and I know he would go back and do it again, even knowing the outcome.  (The video would not embed for some reason, but I am asking you to please click on the link - it is so worth it.)

http://www.komonews.com/news/local/Lewis-McChord-soldier-loses-legs---but-not-his-spirit-178718291.html?tab=video&c=y

*This video was shot in August - Dan is already accomplishing major goals - he just completed the Marine Corps Marathon last month.

I did manage to get one video of Dan to embed from YouTube and it is the perfect one for Veteran's Day...we should all be so thankful to these men and women.


Friday, November 9, 2012

Reunited and it Feels So Good

No post from last night because I was spending the evening with my camp co-counselor, Lacey!!  She was in town for the night and we had a slumber party!!  So so so much fun.  Loved getting to see her...cannot wait to go back to camp!!

Wednesday, November 7, 2012

1001 Ways to Bend a Leg

This was my view at 7am this morning.  The time change may make staying at school until it is dark a bit tough, but it makes my apartment light up at 6am (making sleeping past that almost impossible), but making it easier to get to school earlier and work on my leg.  I was pleased to see that the plastics room looked exactly as I had left it 14 hours previously - my leg in position on the vacuum ready to go.  All I had to do was turn the oven on and wait for it to reach 360 degrees.  (This happens much slower when you can see the oven digitally counting up the degrees).  The slow warm up was probably a good thing for me, gave me a chance to wake up and get ready for a long day of work.  Well, apparently it did not give me long enough to wake up fully - I messed up my first pull of plastic.  Cue the sad violin music.  It was slightly disappointing - mainly because I was geared up and beat the crowd to the plastics room and was ready to get a head start on the day.  This is a really big leg and I took too long pulling the plastic down over the leg.  The plastic began to harden before I could get vacuum suction around the bottom edge (really the top of the leg) sitting down on the wooden wheel.  It is a very sad realization when you have suffered through burning metal on your hands and sculpting this piece of plastic over your mold to find out that you have to redo it.

Alas, I kept a positive attitude and put a new piece of plastic in the oven and began the melting process again.  No coffee needed for this girl, messing up your plastic mold will quickly wake you up and really realign your focus.  There was no way the plastic was getting the best of me today - I had a leg to finish by the end of the day and I was going to finish it!!  Notice in the picture that the end of the residual limb is about the same size in circumference as my head :)
After getting the plastic done right (yes, the second time was the charm), it meant cutting and trimming and grinding.  The cast saw is now my friend and I use it with great confidence.  The sanders and grinders, while we have yet to reach friendship status, we are definitely good acquaintances and I do not mind visiting them every now and then ;)  It is not even that I am intimidated or bothered by the grinding anymore, it is just that I am not a huge fan of doing it.  It is a necessary evil and because of that I am happy to spend half an hour eating plastic dust, but of all the things that come with making legs, this is on the lower end of the totem pole for me.  This picture is what I call "grinding success!"  I used to take the pretty socket and get really excited about how nice it looked...take it to my desk and admire it.  Now I just go ahead and rough up the bottom (it has to be done before the gunking process) and do not leave the grinding room until there is no more grinding to be done.  It does not look that pretty, but the edges feel fabulously smooth and my valve looks and works perfectly.  Grinding is the step before aligning and gunking - I managed to get this much done before noon...time was on my side today.

After lunch, I spent some quality time putting all of my components together.  Although I did not get a fancy microprocessor knee for my patient like I was hoping, I did go ahead and use another Ossur knee we had at the school.  What can I say?  I am brand loyal :)  I actually think I picked a great knee for my patient, he does very very little walking and I think a fancy knee would have been too much for him and he would not have used it to its full potential.  I used an Ossur foot that I have never used before so I am excited to see it in action.  Using these fancier knees (we used really basic ones on the last leg) makes the leg look so much cooler and much more like the prostheses you see out in the real world.  That was exciting for me.

I aligned, I gunked and I fiberglassed.  I then reattached my knee and foot and the result is this beautiful limb you see here before you.  Is that not a nice looking leg?  It is going to be even nicer looking in a week when we make an inner liner for it and laminate the socket - there will be no grinding marks or messy stuff at the bottom.  I am still working on a fun pattern to put on it...I selfishly keep looking for one that pleases me and not really considering what my patient might enjoy.  Hmmm, I might need to factor that in...

It is just that I picture this sitting on my mantle...he will wear it for 15 minutes for critique and move back to his real prosthesis.  I think that allows me some artistic freedom when picking out the fabric pattern to use.  Besides...real mean love pink, right??

Today was a great day - I worked hard, I was very productive and I accomplished the set goal of having a completed leg by the end of the day.  I was even able to get out of school a couple of hours early (totally worth going in early this morning for).  I have a huge pile of school work to do tonight and have been plugging away at it since I got home - the blog is my break for the moment.  Tomorrow we have our patient fittings and, per usual, there is always the fear that my patient will not get into the socket.  I am hoping my beginner's luck does not run out by the morning and I am able to get Paul up and walking - you just never know which way a fitting is going to go.

Did I mention that my favorite part of making trans femoral legs is that it is really cool to see the knee bend?  I do not know why this amazes me so much, but I just love that I have created a leg that moves!!